
If your toilet constantly runs, refills slowly or makes an annoying hissing sound after every flush, you probably need to replace the fill valve—also known as the toilet ball(fill) valve. This small but essential component controls how your toilet tank refills after each flush. When it starts to fail, it can waste water, increase your utility bill and make your bathroom noisy and inefficient.
The good news? Learning how to change a toilet ball(fill) valve is easier than you might think. With just a few basic tools and a universal valve kit from any hardware store, you can get the job done yourself in under 30 minutes. No special plumbing knowledge or experience required.
In this detailed guide, we’ll walk you through the entire process step by step. You’ll learn how to identify the problem, safely remove the old valve, install a new one correctly and make the necessary adjustments to restore full toilet function.
What Is a Toilet Fill Valve?
A toilet ball(fill) valve is a vertical mechanism inside your toilet tank that controls the inflow of water from your home’s plumbing system into the tank. Once you flush the toilet, the water level drops. The fill valve then opens to refill the tank. As the water rises, a float rises with it, eventually shutting off the valve when the correct water level is reached.
There are two common types:
-
Ballcock-style (traditional) — uses a horizontal arm with a floating ball to regulate the valve.
-
Float-cup (modern) — uses a vertical plastic float that slides up and down a shaft.
Most modern toilets use the float-cup design, which is more compact and more responsive. Over time, all fill valves wear out. The float may stick, the internal seals may leak or sediment from your water supply may clog the inlet. When that happens, you may notice:
-
The toilet keeps running or takes forever to fill.
-
A loud, high-pitched hissing sound from the tank.
-
Water trickling into the bowl after a flush.
-
Uneven or weak flush performance.
When any of these symptoms show up, changing the fill valve is your best fix.
Tools and Materials You’ll Need
To replace a fill valve, you don’t need anything complicated. In fact, the job can usually be done with tools most people already have at home.
Tools:
-
Adjustable wrench or channel-lock pliers: You’ll use this to loosen the water supply line and the mounting nut under the tank.
-
Sponge or rag: Used to soak up any leftover water inside the tank before you remove the old valve.
-
Small bucket or bowl: Placed under the tank to catch any water that may leak when you disconnect the supply line.
Materials:
-
New toilet ball(fill) valve kit: Most hardware stores sell universal replacement kits that include the valve, refill tubing, mounting hardware and installation instructions.
-
Teflon tape (optional): You may use this to help seal threaded connections, though many valves come with rubber washers that seal just fine on their own.
Always buy a universal valve unless you’re dealing with a specialty toilet. The universal type works with nearly all two-piece toilets and even many one-piece models.
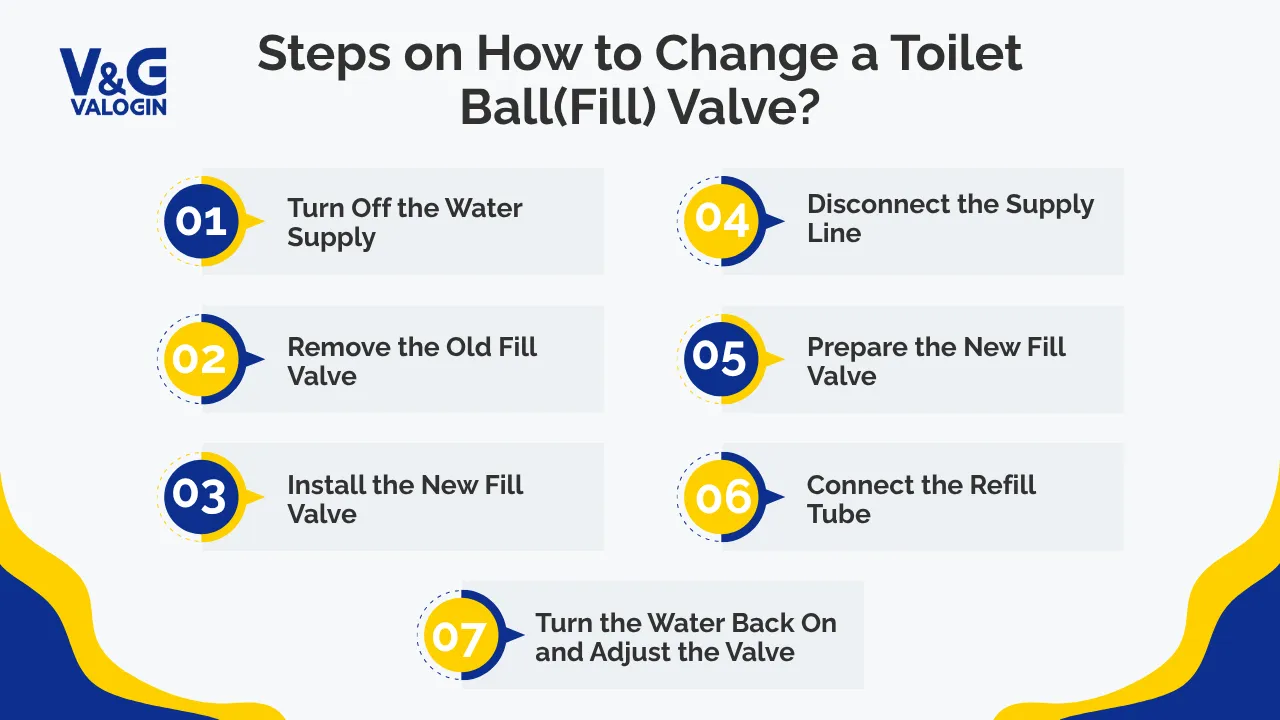
Step 1: Turn Off the Water Supply
Before touching anything inside the tank, you need to shut off the water supply to prevent a mess. Locate the shutoff valve — it’s usually found on the wall or floor just behind the toilet. Turn it clockwise until it stops. This closes the valve and prevents more water from entering the tank.
Next, flush the toilet and hold down the handle to drain as much water from the tank as possible. Once the tank is mostly empty, there will still be a small amount of water sitting at the bottom.
Use your sponge or towel to soak up the remaining water. This makes the valve easier to remove and avoids water dripping onto the floor when you loosen the supply connection.
Step 2: Disconnect the Supply Line
Look underneath the toilet tank. You’ll see a flexible water supply line connecting the bottom of the tank to the shutoff valve. This line carries water into the fill valve every time you flush.
Use your adjustable wrench or pliers to loosen the nut that connects the line to the tank (not the wall side). This may take a little force if it hasn’t been removed in a long time.
Keep your bucket or rag underneath this area, as water left in the line will spill out when you loosen the connection.
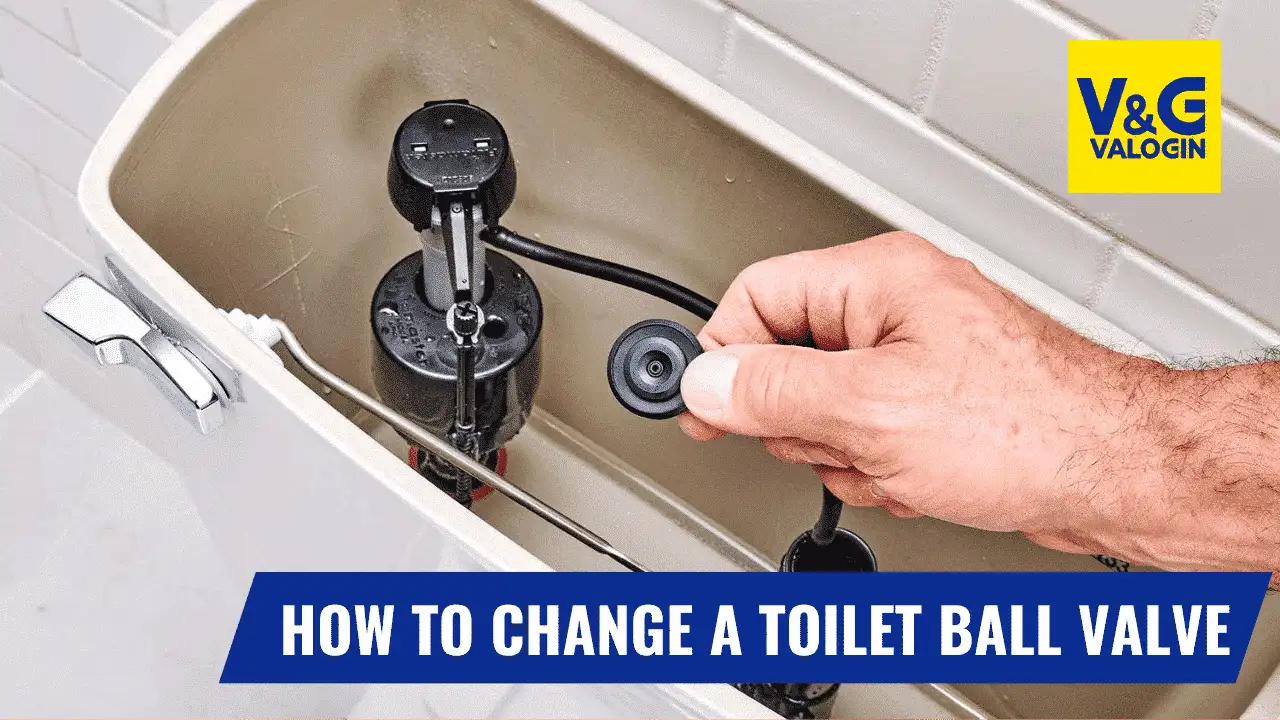
Step 3: Remove the Old Fill Valve
With the supply line disconnected, locate the large plastic locknut on the underside of the tank. This is what holds the old fill valve in place. Use your wrench or your hand to loosen it by turning counterclockwise. Once it’s off, lift the old valve straight up and out of the tank.
Don’t forget to detach the small refill tube that runs from the fill valve to the overflow tube in the tank. This tube is critical—it directs water into the bowl during the refill process to keep the flush working properly.
Once the valve is out, clean the tank’s bottom opening with a rag to remove mineral buildup or debris.
Step 4: Prepare the New Fill Valve
Unbox your new fill valve and read the included instructions. Most modern valves are height-adjustable, allowing them to fit a variety of toilet tank sizes. You’ll need to set the valve height so that the top of the valve is about 1 inch above the top of the overflow tube inside your tank.
To adjust the height, twist the top portion of the valve shaft until the height matches your tank. Make sure the rubber washer on the valve’s base is seated firmly — this prevents leaks when you mount it.
Attach the new refill tube to the nipple near the top of the valve body. You’ll connect this to the overflow pipe later.
Step 5: Install the New Fill Valve
Insert the new fill valve through the hole in the bottom of the tank. The rubber washer should sit inside the tank, creating a watertight seal.
From below, screw the mounting locknut back onto the threaded shaft and hand-tighten it. Then use your wrench to give it an extra quarter-turn — just enough to secure it without over-tightening. If you go too far, you risk cracking the tank or damaging the valve threads.
Reconnect the water supply line to the base of the valve. Tighten the connection with your wrench until snug but avoid over-tightening, especially if you’re using a plastic fill valve.
Step 6: Connect the Refill Tube
The refill tube directs a small stream of water into the overflow pipe during the refill process. This ensures the toilet bowl fills to the proper level after each flush.
Clip the refill tube into place by inserting it into the overflow pipe and using the included clip to hold it. The tube should sit just above the opening of the overflow, not submerged in water. Submerging the tube can create back-siphoning and potential contamination of your water supply.
Double-check that the refill tube is secure and not kinked or dangling loose.
Step 7: Turn the Water Back On and Adjust the Valve
With everything installed and connected, it’s time to restore water flow. Slowly turn the shutoff valve counter-clockwise to open the water line. You’ll hear the tank begin to fill.
As it fills, keep an eye on the connections underneath the tank and around the valve inside. If you see any leaks, tighten the connections just slightly until the dripping stops.
Once the tank is full, flush the toilet and observe how the system works. You want the water level to stop about ½ inch below the top of the overflow pipe.
If the water level is too high or too low:
-
Adjust the float height on the new valve.
-
Most models have a screw or sliding clip to raise or lower the float.
Make small adjustments and test again until the fill level is perfect.
Final Checks and Cleanup
Once you’ve verified that the tank fills properly, the valve shuts off cleanly and there are no leaks, you’re done.
Wipe up any water from the base of the toilet, store your tools and dispose of the old valve. Flush the toilet a few more times to make sure everything runs smoothly.
If you ever hear running water again or see the water level changing on its own, check the refill tube, float and connections. Most problems are easy to fix once you know what to look for.
Final Thoughts
Replacing a toilet ball(fill) valve is one of the easiest plumbing repairs you can make. You don’t need special tools, it costs less than $20 and the fix can eliminate several common problems:
-
Running toilets
-
Hissing noises
-
Weak flushes
-
Slow refills
-
High water bills
It’s also a great time to check other components inside your tank, like the flapper or flush valve and replace those too if needed. With this one simple repair, you can improve toilet performance, conserve water and avoid bigger issues down the road.

