

Whether you’re fixing a leak under your sink or upgrading plumbing hardware, learning how to replace an angle stop shut-off valve is a valuable skill for any homeowner or DIY enthusiast. These small valves, often tucked beneath sinks and behind toilets, control the flow of water to individual fixtures. Over time, they can wear out, leak or seize up—making them ineffective or even hazardous if left unchecked.
Replacing a faulty shut-off valve is not only a practical solution but also a preventative measure that can save you from water damage, costly repairs and plumbing emergencies. In this comprehensive guide, we’ll walk you through each step of the process in detail—from identifying the right valve to installing it safely and correctly. Whether you’re working with a compression, push-fit or threaded valve, this tutorial ensures a smooth and leak-free installation.
What Is an Angle Stop Shut-Off Valve?
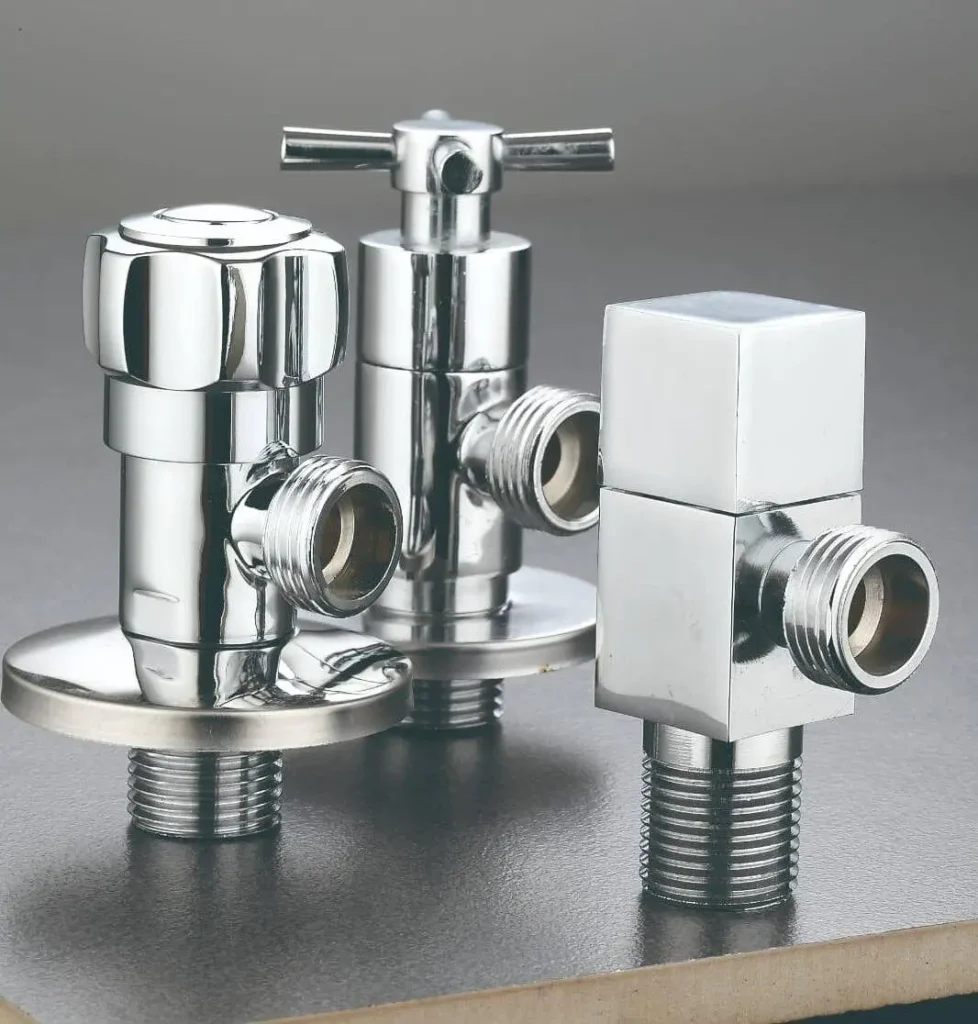
An angle stop shut-off valve is a plumbing fixture used to isolate the water supply to a single fixture, such as a faucet or toilet. Its distinctive 90-degree angle helps route water from the wall or floor pipe directly to the fixture above. It allows homeowners or plumbers to shut off water locally—without affecting the entire household’s water supply.
Angle stop valves are typically made of brass or chrome-plated metal and are available in various connection types, such as compression, sweat (solder), threaded or push-fit (SharkBite) designs. While durable, these valves often develop issues over time—such as corrosion, internal failure or sticking—making timely replacement essential.
Signs That You Need to Replace Your Angle Valve
Before diving into the replacement process, it’s important to identify whether the valve actually needs replacing. Here are some clear warning signs:
-
Visible Leaking: Water dripping around the base of the valve or where it connects to the pipe is a strong indicator that internal seals have failed.
-
Stuck or Hard to Turn: If the valve doesn’t rotate easily or gets jammed halfway, it’s a sign of internal corrosion or buildup.
-
Water Doesn’t Shut Off: Even after turning the valve completely, if water continues to trickle to the faucet or toilet, it means the valve is no longer functioning.
-
Rust or Mineral Buildup: Discoloration or crusty deposits around the valve body may point to slow leaks or aging materials.
-
Age and Wear: If your valve is over 10–15 years old or was never replaced during fixture upgrades, it’s smart to proactively install a new one.
Addressing these issues early not only restores functionality but also prevents water damage and improves plumbing safety.
Tools and Materials You’ll Need
Before starting the replacement process, gather all necessary tools and materials to ensure a smooth, uninterrupted workflow:
Tools:
-
Adjustable wrench or two channel-lock pliers
-
Pipe cutter (for copper pipes if dealing with soldered valves)
-
Flathead screwdriver
-
Penetrating oil (for loosening corroded parts)
-
Towel or bucket (to catch residual water)
-
Rag or emery cloth (for pipe cleaning)
Materials:
-
Teflon tape (for threaded connections)
-
Replacement angle stop valve (ensure the connection type matches your pipe)
-
Optional: compression sleeve puller (for removing old ferrules from compression fittings)
Be sure to purchase the correct size and type of valve: match it to your pipe (usually 3/8″ or 1/2″) and choose between compression, threaded or push-to-connect styles depending on your existing plumbing.
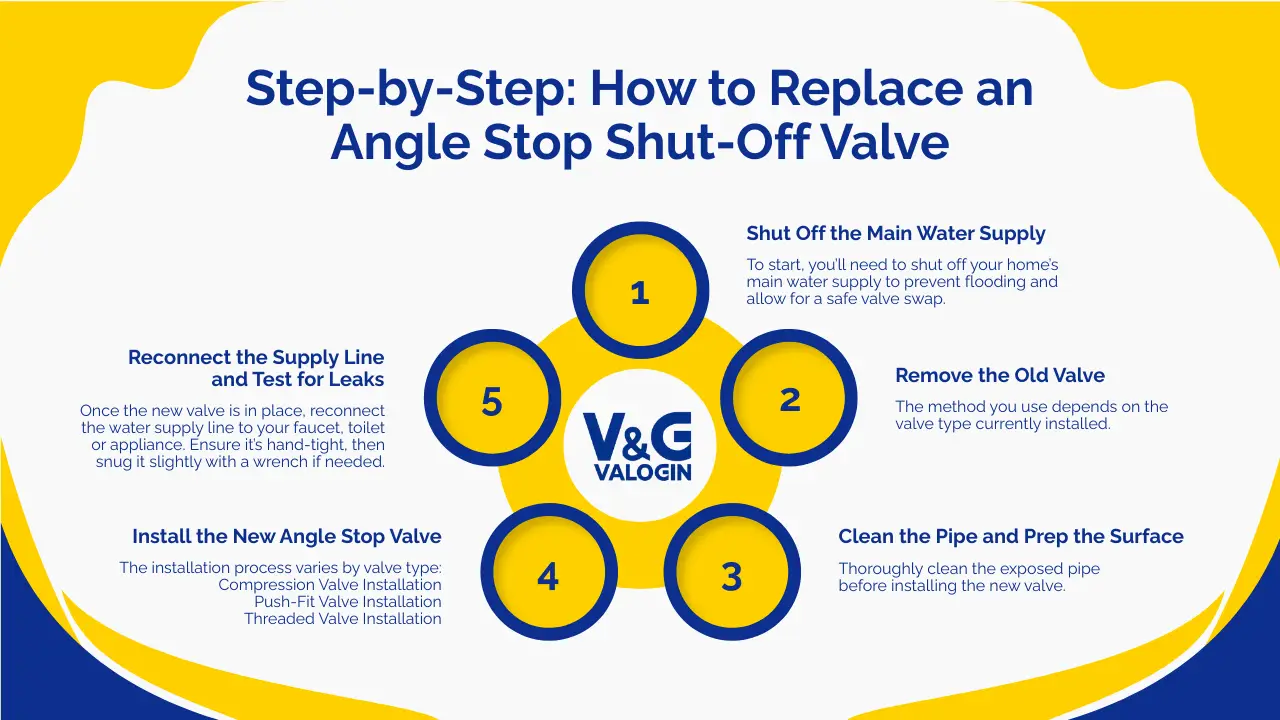
Step-by-Step: How to Replace an Angle Stop Shut-Off Valve
1. Shut Off the Main Water Supply
To start, you’ll need to shut off your home’s main water supply to prevent flooding and allow for a safe valve swap. Locate the main shut-off valve—usually found near your water meter or where the water line enters your house. Turn it clockwise to close it.
Once closed, open a faucet at the lowest point in your home (like a basement or first-floor sink) to drain remaining water and relieve pressure in the system.
2. Remove the Old Valve
The method you use depends on the valve type currently installed.
For Compression Fittings:
-
Loosen the compression nut with one wrench while holding the valve steady with another.
-
Slide off the valve, leaving behind the compression ring (ferrule) and nut.
-
If reusing the pipe, try to remove the old compression ring—use a compression sleeve puller if necessary.
For Push-Fit Valves:
-
Use a disconnect tool or clip designed for your brand (e.g. SharkBite).
-
Push the release collar in while pulling the valve straight off the pipe.
For Soldered (Sweat) Valves:
-
Use a pipe cutter to remove the valve and a short length of pipe behind it.
-
Clean the freshly cut pipe thoroughly with emery cloth before installation.
This step may require some effort, especially if the valve is corroded or stuck. If needed, spray penetrating oil and let it sit for a few minutes before attempting removal.
3. Clean the Pipe and Prep the Surface
Thoroughly clean the exposed pipe before installing the new valve. Use a rag to wipe away debris or an emery cloth to remove corrosion or old sealant.
For copper or brass pipes, make sure the surface is smooth and undamaged. A clean pipe ensures a tight seal and reduces the risk of leaks. Do not reuse old ferrules or compression rings—always install new ones.
4. Install the New Angle Stop Valve
The installation process varies by valve type:
Compression Valve Installation:
-
Slide the new compression nut and ring onto the pipe.
-
Push the valve body onto the pipe until it seats fully.
-
Tighten the nut using two wrenches—one on the valve and one on the nut. Avoid overtightening.
Push-Fit Valve Installation:
-
Push the valve straight onto the cleaned pipe until it clicks and seats securely.
-
Mark the pipe insertion depth before pushing the valve to ensure proper seating.
Threaded Valve Installation:
-
Wrap Teflon tape clockwise around the male threads (2–3 layers).
-
Screw the valve onto the fitting by hand, then tighten gently with a wrench.
Make sure the valve’s outlet aligns correctly with the fixture’s water supply line for easy reconnection.
5. Reconnect the Supply Line and Test for Leaks
Once the new valve is in place, reconnect the water supply line to your faucet, toilet or appliance. Ensure it’s hand-tight, then snug it slightly with a wrench if needed.
Turn the valve to the off position, then slowly restore the main water supply. Check your new installation for any leaks at the valve inlet and outlet. Finally, open the valve to allow water to flow to the fixture and verify that it shuts off correctly.
If you see any drips or moisture, shut off the water again and retighten connections or reapply Teflon tape.
Maintenance Tips for Longevity
After replacement, keep your new angle valve in good shape by following these tips:
-
Turn it on/off occasionally (every few months) to prevent sticking or corrosion.
-
Inspect for leaks during seasonal plumbing checks.
-
Avoid over-tightening the handle, which can damage internal seals.
Proper maintenance ensures that your valve stays functional for years to come.
When to Call a Professional Plumber
While this DIY task is straightforward for most homeowners, some scenarios may require expert help:
-
Your pipes are soldered and you’re uncomfortable using a torch.
-
The valve is fused to the pipe due to excessive corrosion.
-
You discover pipe damage during removal.
-
The plumbing is in a hard-to-access location.
If you’re unsure or concerned about causing a leak, hiring a licensed plumber is the safest option.
Conclusion
Replacing an angle stop shut-off valve is one of the most practical plumbing upgrades you can do on your own. Whether you’re solving a leak or prepping for a new fixture installation, this repair restores functionality and protects your home from potential water damage.
By following the steps in this guide, you’ll not only ensure a successful valve replacement but also gain confidence in your DIY plumbing skills. Remember, selecting the right valve type, prepping your work area and ensuring leak-proof connections are the keys to success.

