
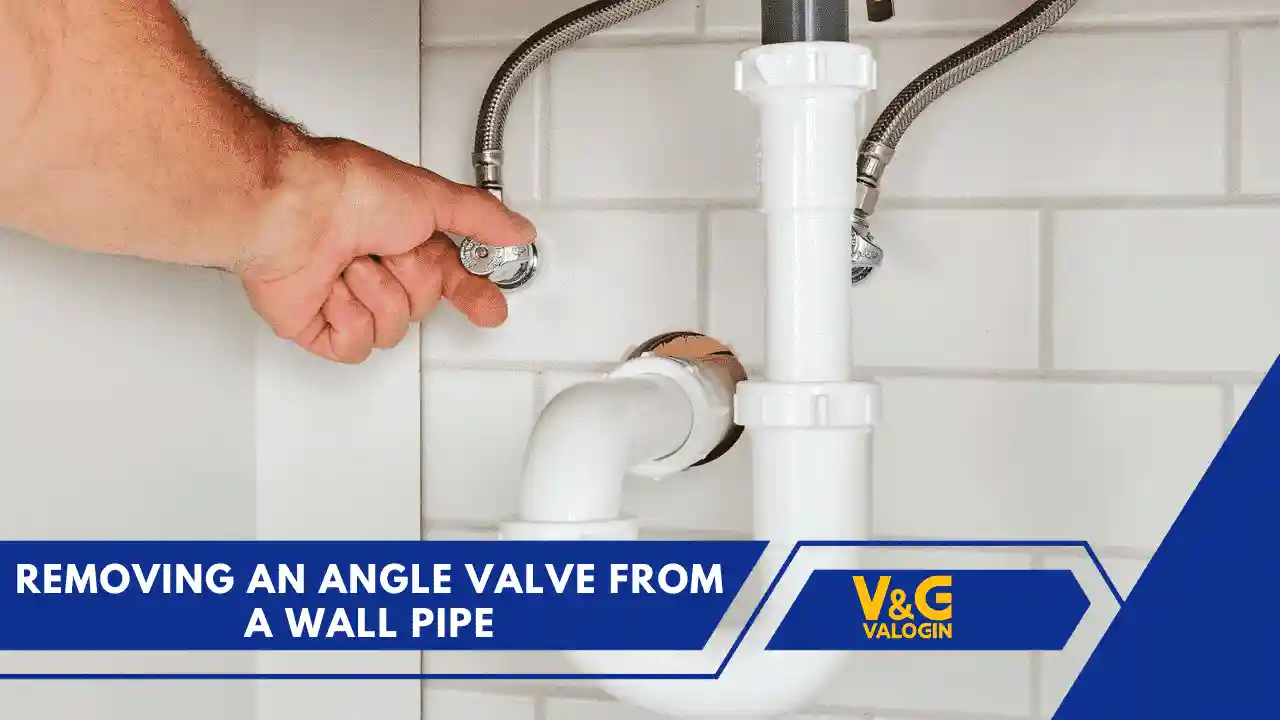
Learning how to removing an angle valve from a wall pipe is a key skill for anyone interested in basic home plumbing maintenance or repairs. An angle valve—also known as an angle stop valve—is a small but crucial fitting found under sinks, behind toilets and near other plumbing fixtures. Its main purpose is to control water flow to a specific fixture without needing to shut off the entire home’s water supply.
Over time, angle valves can become worn out, leaky or corroded. Sometimes, they may stop functioning entirely, which can lead to water damage if not fixed in time. In such cases, replacing the valve is often the best solution. Fortunately, removing an angle valve is not too complex. With the right tools, proper preparation and a clear guide, even beginners can complete this plumbing task successfully. In this blog post, we’ll walk you through everything you need to know, from identifying your valve type to safely removing it from the wall pipe.
What Is an Angle Valve?
An angle valve is a compact shut-off valve designed to regulate the flow of water to a single plumbing fixture. It gets its name from its shape, as the inlet and outlet form a 90-degree angle. Angle valves are typically used where plumbing lines come out of the wall—most commonly behind toilets and beneath sinks. They let you turn off water to just one area without disrupting the rest of your home’s plumbing.
There are two main types of angle valves:
-
Compression angle valves, which use a nut and ferrule to create a watertight seal.
-
Threaded angle valves, which screw directly onto threaded pipe fittings.
Knowing your valve type is important for removal, as the tools and technique may vary slightly.
When Should You Remove or Replace an Angle Valve?
You may need to remove or replace an angle valve for several reasons. Some of the most common include:
-
Leaks or drips: A worn-out valve may leak at the handle or where it connects to the pipe.
-
Corrosion or mineral buildup: Hard water can cause buildup, leading to reduced performance.
-
Valve won’t turn or shut off properly: This makes it useless in emergencies.
-
Upgrading plumbing fixtures: Installing new faucets or toilets often requires new, matching valves.
-
Preventive maintenance: If you’re remodeling or updating old plumbing, it’s a good time to replace old valves before they fail.
Timely replacement helps prevent unexpected plumbing problems and water damage.
Tools and Materials Needed
Before starting, make sure you have the following tools and materials ready:
-
Adjustable wrench or spanner – For loosening nuts
-
Channel-lock pliers – To grip and stabilize parts
-
Teflon tape (plumber’s tape) – For sealing threaded connections
-
Bucket or small container – To catch residual water
-
Clean rag or towel – For drying off any spills
-
New angle valve – Make sure it matches the existing pipe type
-
Penetrating oil (optional) – To loosen stuck connections
Having these items handy ensures a smooth and safe valve removal process.
Step-by-Step: How to Remove an Angle Valve from a Wall Pipe
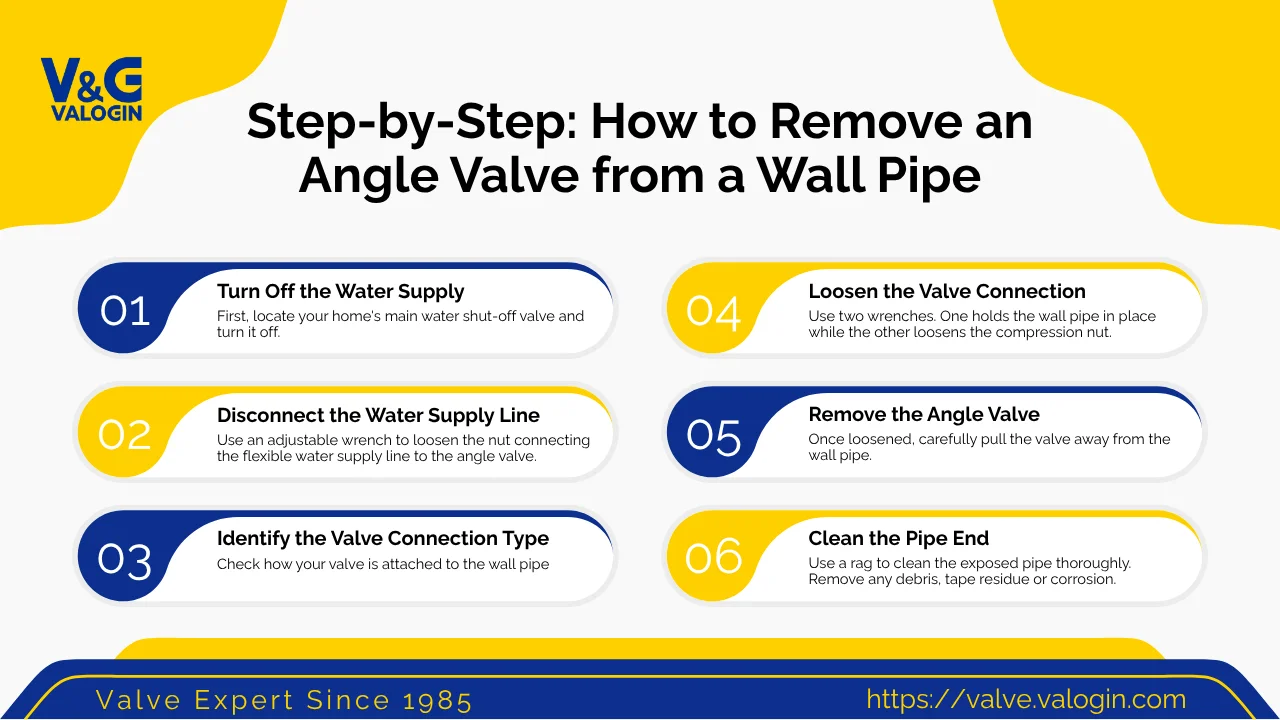
1. Turn Off the Water Supply
First, locate your home’s main water shut-off valve and turn it off. This is typically found where the water line enters the house. Once shut off, turn on a nearby faucet to release water pressure and drain any remaining water from the pipes. This helps prevent spillage when you remove the valve.
2. Disconnect the Water Supply Line
Use an adjustable wrench to loosen the nut connecting the flexible water supply line to the angle valve. Turn the nut counterclockwise until the line disconnects. Have a bucket or towel ready to catch any remaining water. If the nut is corroded or tight, use penetrating oil to loosen it.
3. Identify the Valve Connection Type
Check how your valve is attached to the wall pipe:
-
Compression fitting: Has a visible nut and small brass ring (ferrule).
-
Threaded fitting: Screws directly onto a male pipe thread.
Knowing this helps you choose the correct removal method.
4. Loosen the Valve Connection
-
For a compression valve, use two wrenches. One holds the wall pipe in place while the other loosens the compression nut. Be careful not to twist or damage the pipe.
-
For a threaded valve, turn it counterclockwise with a wrench until it unscrews. Use steady pressure to avoid bending or cracking the pipe.
If it’s stuck, gently apply penetrating oil and wait a few minutes before trying again.
5. Remove the Angle Valve
Once loosened, carefully pull the valve away from the wall pipe. For compression valves, the ferrule might stay on the pipe. You can either reuse it (if in good condition) or remove it using a ferrule puller tool.
6. Clean the Pipe End
Use a rag to clean the exposed pipe thoroughly. Remove any debris, tape residue or corrosion. A clean surface ensures a good seal if you plan to install a new valve.
Tips for Easy and Safe Valve Removal
-
Use two wrenches to prevent twisting wall pipes.
-
Label shut-off valves if you have multiple, to avoid confusion later.
-
If the compression nut won’t budge, apply heat using a hair dryer or use a dedicated compression sleeve puller.
-
Always wrap threaded connections with Teflon tape before reinstalling a valve.
Conclusion
Removing an angle valve from a wall pipe may seem daunting at first but with the right knowledge and tools, it’s a task any confident DIYer can handle. Whether you’re fixing a leak, upgrading fixtures or performing routine maintenance, knowing how to replace or removing an angle valve from a wall pipe helps keep your plumbing system in good shape. Take your time, follow each step carefully and enjoy the satisfaction of tackling a plumbing job on your own.

