
Embarking on a do-it-yourself plumbing project can initially appear daunting, particularly when faced with the task of replacing a worn-out or leaky angle valve under your sink. However, fear not, as we’ve meticulously prepared this comprehensive step-by-step guide to walk you through the process with confidence and clarity. Angle valves, often referred to as shut-off valves, play a pivotal role in controlling the water supply to various fixtures, such as sinks and toilets. Over time, due to the inevitable wear and tear or an occasional pesky leak, these valves may require replacement. Our guide is here not only to demystify the procedure but also to empower you to take matters into your own hands, helping you save time, money, and potential stress.
Equipping Yourself with Essential Tools and Materials
Before you embark on your plumbing odyssey, it’s imperative to meticulously gather all the necessary tools and materials. Doing so not only ensures a seamless experience but also establishes a strong foundation for the successful completion of the project. You’ll need an adjustable wrench and a pipe wrench, each serving distinct roles in handling the various types of connections you’ll encounter.
Teflon tape, a seemingly simple addition, plays a critical role in creating watertight seals that can significantly contribute to the longevity of your plumbing setup. Moreover, a trusty bucket or absorbent towels mustn’t be overlooked; their role in catching any water spills during the process is pivotal. And let’s not forget the star of the show—the new angle valve itself. Ensure that it impeccably matches the specifications of the existing valve to guarantee a seamless transition.
Step 1: Halting the Flow of Water
Every plumbing journey commences with the pivotal act of shutting off the water supply. As you locate your home’s main water shut-off valve and make the deliberate decision to turn it off, you symbolically take control of the impending project. With a sense of purpose, you then turn on the sink faucet to usher in a cathartic moment—the sound of water trickling away, signifying the start of your journey towards plumbing prowess.
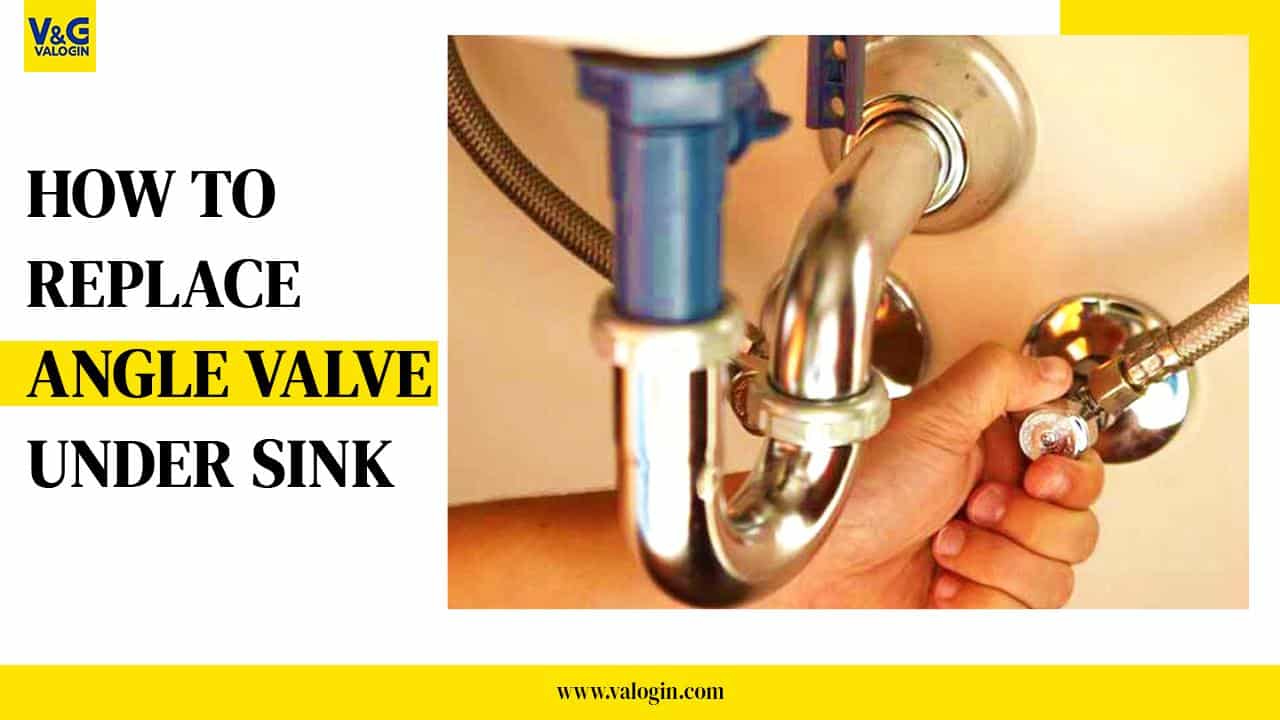
Step 2: Bidding Farewell to the Old Valve
Armed with determination and your adjustable wrench, you embark on the task of delicately loosening and disconnecting the nuts that once held the old angle valve in place. This part of the process, while seemingly straightforward, offers a glimpse into the intimate relationship between hardware and function. In cases where the old valve clings stubbornly to its position, the pipe wrench emerges as the unsung hero, providing the necessary leverage to gracefully release its grip. As you navigate this step, your bucket or strategically placed towels stand by, ready to collect any remnants of water that dare to escape during this dance of detachment.
Step 3: Preparing the New Angle Valve
As you embrace the promise of a new beginning, the artistry of preparation takes center stage. Teflon tape, a modest yet potent tool in your arsenal, is thoughtfully wound around the threaded ends of the new angle valve. With each careful wrap, you create a fortress of protection against future leaks, a testament to the foresight embedded within your DIY endeavor.
Step 4: The Grand Installation
The culmination of your efforts thus far arrives as you ceremoniously thread the new angle valve onto the water supply pipe and the faucet supply line. The dance of the threads, seemingly insignificant yet profoundly impactful, symbolizes the fusion of past and present, old and new. As the nuts gradually tighten, an unspoken agreement takes shape—one of balance and integrity. This tightening, a tactile manifestation of your commitment to craftsmanship, is guided by the principle of “just enough”—a gentle embrace that steadfastly secures without overpowering.
Step 5: Diligent Leak Testing
With the new valve now a stalwart sentinel of your plumbing infrastructure, the time comes to test its mettle. The process unfolds as you cautiously turn on the main water supply valve, eyes trained on the area surrounding the freshly anointed angle valve. The anticipation is palpable as droplets of water begin their tentative journey, their path scrutinized for any sign of rebellion. Should a leak dare to manifest, your response is methodical—gentle adjustments, minute twists, until equilibrium is achieved. In this intimate exchange, you become one with the plumbing tapestry, coaxing it into perfect harmony.
Step 6: Reconnecting the Sink
As the tapestry takes its final shape, your attention turns to the restoration of unity. With a sense of purpose, you reconnect the sink faucet supply line to the newly anointed valve. Here, your wrenches serve as extensions of your will, tightening with precision and intention. Each turn serves as a testament to your meticulousness, a silent nod to the interplay between human hands and the machinery that serves them.
Step 7: The Moment of Truth
In the grand finale of your plumbing symphony, you usher in a moment of truth. The main water supply valve is coaxed open, and the sink faucet is invited to join in the chorus. Water flows, unfettered and unhindered, coursing through the pipes as if in celebration of a job well done. As you gaze upon the fruits of your labor, a sense of accomplishment washes over you, much like the water that now flows freely, a gentle reminder of the role you’ve played in restoring equilibrium.
In Conclusion
The journey of replacing an angle valve beneath your sink is not merely a technical endeavor; it’s a testament to your ability to engage with the tangible world, to navigate the realm of hardware and connections. Armed with the wisdom of this comprehensive guide and the spirit of adventure, you’ve ventured into the realm of plumbing with a newfound confidence.
You’ve not only replaced a valve but woven yourself into the intricate tapestry of your home’s plumbing system. Remember, as you embark on future endeavors, that every twist of a wrench, every careful placement of tape, is a brushstroke in the masterpiece of your DIY journey. And should uncertainty ever cloud your path, know that the world of professionals is always at your service, ready to assist and guide.

