
At the heart of a well-functioning water tank lies a seemingly humble yet crucial component – the float valve. This unassuming device is the guardian of water levels, preventing overflows and ensuring a consistent water supply. If you’ve ever wondered how to fine-tune this essential mechanism, you’re in the right place. Adjust the float valve in a Water Tank is a simple yet vital skill for every homeowner, promising a more efficient and hassle-free water management system.
In this guide, we’ll demystify the process, breaking it down into easy-to-follow steps. Whether you’re a DIY enthusiast or just getting started with home maintenance, these straightforward instructions will empower you to confidently regulate your water tank’s float valve and keep potential issues at bay. Let’s delve into the world of float valve adjustments and ensure your water tank operates at its best.
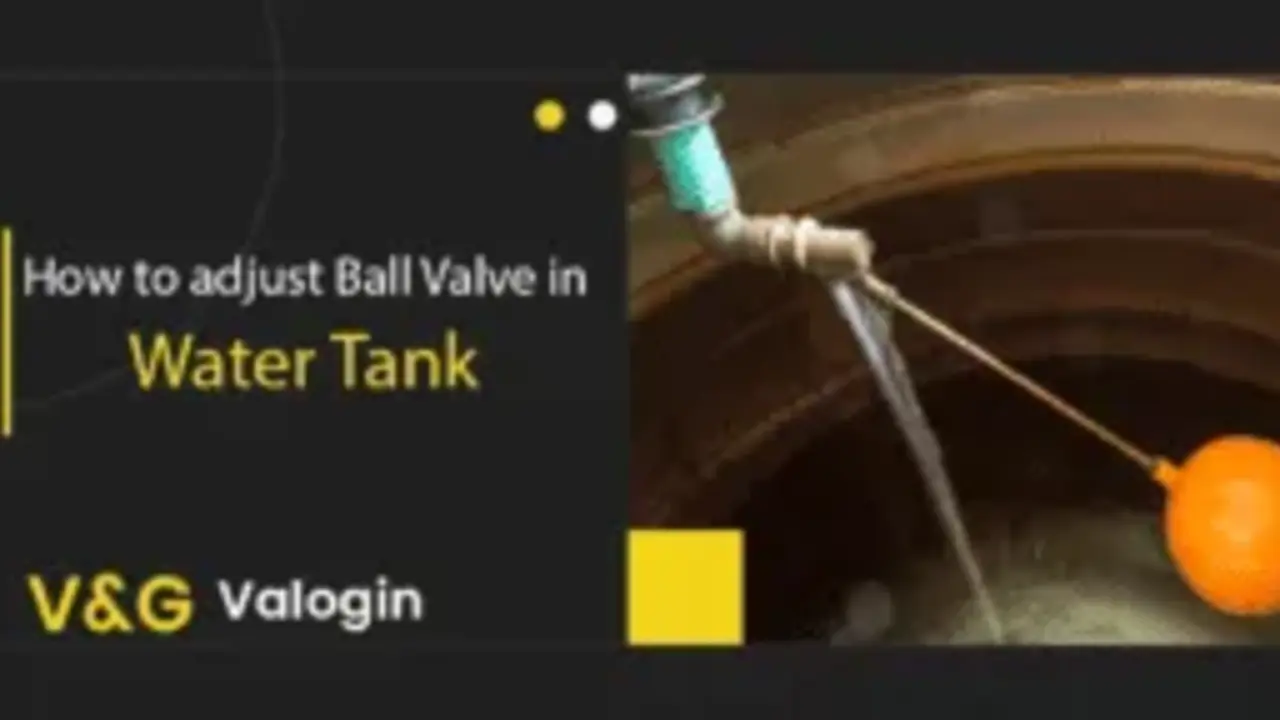
Understanding the Float Valve: A Primer
Before delving into the adjustment process, let’s grasp the basics of the float valve. This unassuming device operates on a simple yet ingenious principle: it floats on the water’s surface inside the tank. As the water level rises, the float ascends with it, triggering the valve to shut off the water supply. Conversely, when the water level drops, the float descends, reopening the valve and allowing water to refill the tank. This automatic regulation is a failsafe mechanism preventing overflows and maintaining a consistent water level, making the float valve a linchpin in the proper functioning of your water tank.
Required Tools:
Certainly! Here’s a concise list of tools you might need for adjusting the float valve in your water tank:
1. Adjustable Wrench
2. Screwdriver (Flathead and Phillips)
3. Pliers
4. Bucket
5. Teflon Tape
Step 1: Locating the Float Valve

The initial step in adjusting the float valve involves identifying its precise location within the water tank. Most commonly, you’ll find it strategically positioned near the top of the tank, connected to the water supply line. Familiarizing yourself with this setup not only sets the stage for a successful adjustment but also enhances your overall understanding of the water tank’s mechanics.
Step 2: Turn Off the Water Supply
Before embarking on any adjustments, it is crucial to turn off the water supply to the tank. This step ensures a safe and controlled environment for your tinkering. Locate the shut-off valve, typically situated on the water supply line leading to the tank, and give it a gentle clockwise turn until it is fully closed. This precautionary measure prevents water from flowing into the tank during the adjustment process.
Step 3: Assessing the Water Level
With the water supply now turned off, take a moment to carefully observe the current water level in the tank. This visual assessment serves as a diagnostic tool, helping you determine whether the float valve requires adjustment. If the water level consistently appears too high or too low, it indicates that it’s time to fine-tune the float valve to achieve optimal regulation and prevent potential issues down the line.
Step 4: Adjusting the Float Arm
The float arm, a pivotal component responsible for controlling the float valve’s operation, is usually a metal or plastic rod connected to the float. To adjust the water level, locate the adjustment screw or clip situated on the float arm. Turning this screw or adjusting the clip allows you to modify the angle of the float arm, subsequently altering the water level at which the valve shuts off. This nuanced adjustment empowers you to fine-tune the delicate balance of your water tank’s functionality.
Step 5: Testing and Fine-Tuning
After making the necessary adjustments, it’s time to turn the water supply back on and observe the float valve in action. As the tank refills, closely monitor the water level. If needed, repeat the adjustment process until you achieve the desired water level. It’s important to recognize that this step is a trial-and-error process, and don’t hesitate to make further tweaks until you find the optimal configuration. This meticulous testing and fine-tuning ensure that your adjustments are precise and effective.
Conclusion: A Well-Regulated Water Tank
Mastering the art of adjusting the float valve is a valuable and empowering skill for any homeowner. Beyond preventing potential overflows, it contributes significantly to water conservation efforts. Regularly checking and adjusting the float valve ensures that your water system operates with efficiency, saving you from potential headaches and water-related damages. By following these comprehensive steps, even those with minimal plumbing experience can confidently take control of their water tank’s performance and contribute to a sustainable and well-regulated home water system.

