
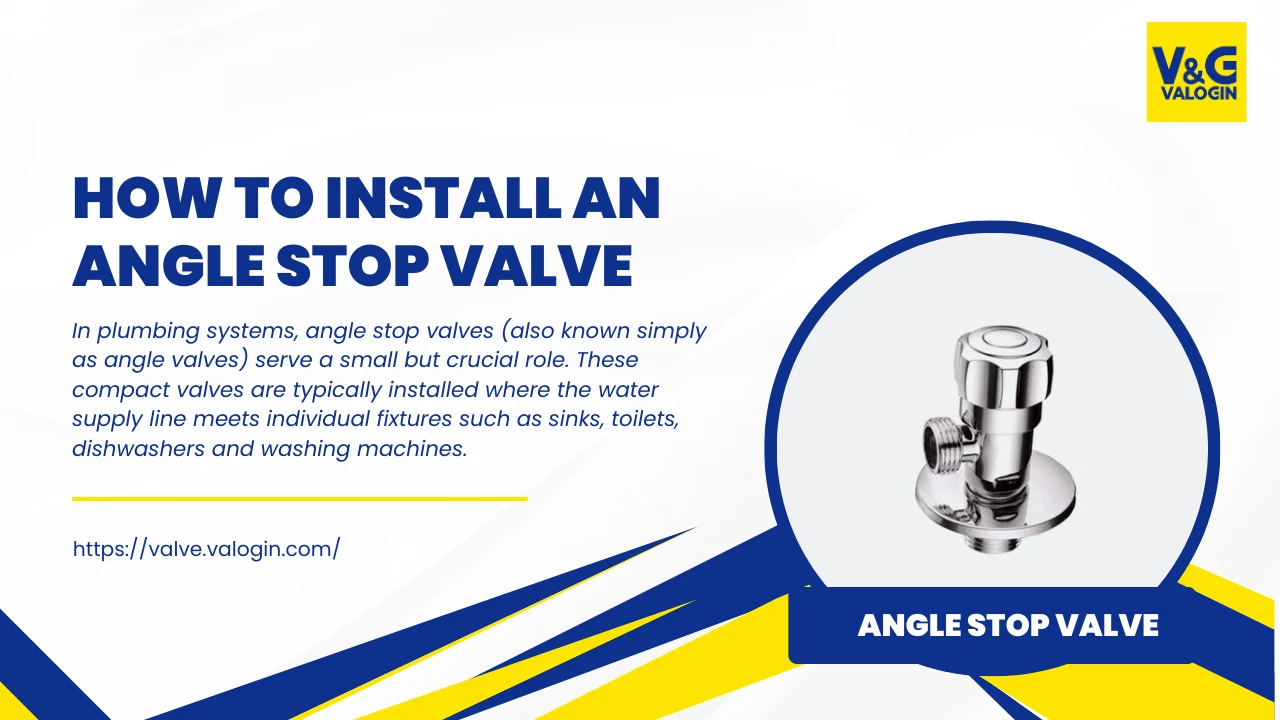
In plumbing systems, angle stop valves (also known simply as angle valves) serve a small but crucial role. These compact valves are typically installed where the water supply line meets individual fixtures such as sinks, toilets, dishwashers and washing machines. Their purpose is simple: they allow you to shut off water to a single fixture without affecting the water supply to the entire house. That’s incredibly useful during maintenance, upgrades or emergencies.
Whether you’re replacing an old valve or installing a new one during renovation, knowing how to install an angle stop valve yourself can save time and money. While it might seem like a job for a professional plumber, this task is entirely doable with some basic tools and a bit of patience. In this guide, we’ll walk you through the full process—step by step—so you can install an angle stop valve safely and confidently.
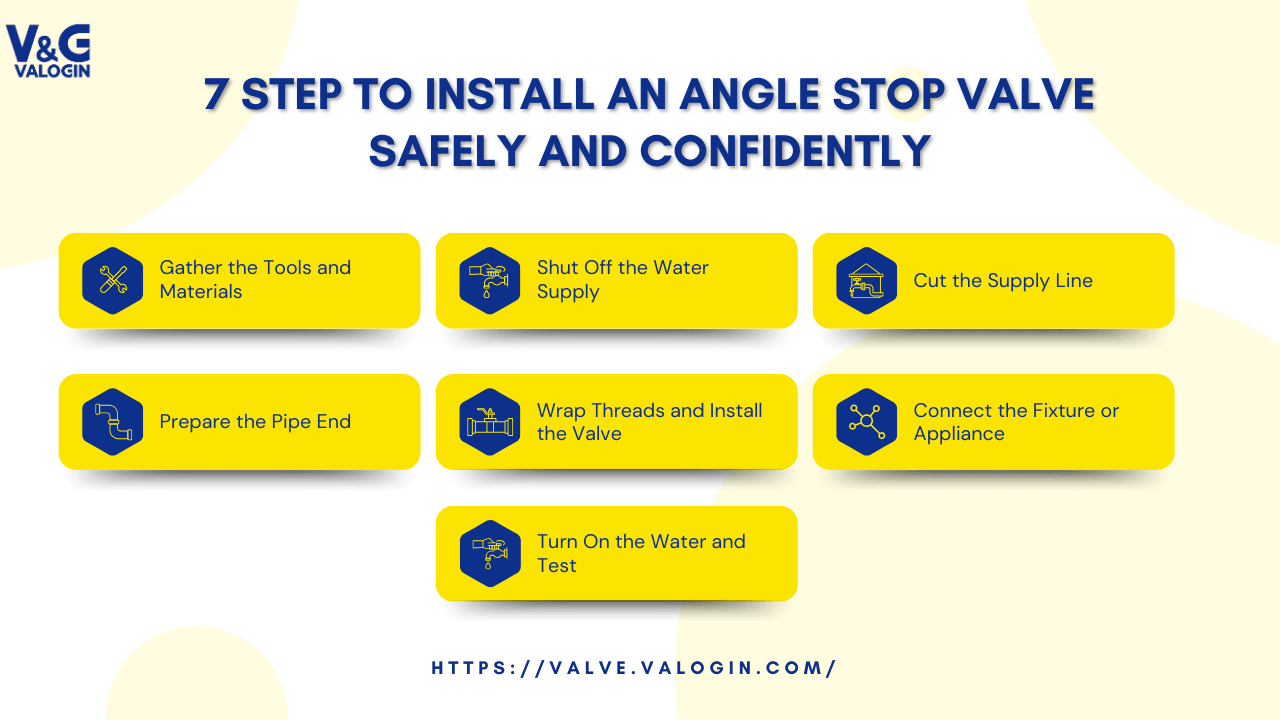
Step 1: Gather the Tools and Materials
Before starting any installation, make sure you have everything you need on hand. Having the right tools ensures a smoother workflow and prevents delays mid-task.
You’ll need:
-
Angle stop valve (compatible with your pipe type and size)
-
PTFE tape (also known as plumber’s tape)
-
Adjustable wrench
-
Pipe cutter (for copper pipes) or hacksaw (if no cutter is available)
-
Emery cloth or fine-grit sandpaper
-
Copper tubing (if a new pipe section is needed)
Double-check the valve type. Most angle stop valves are compression-style or threaded. Ensure the one you have matches your pipe connection and intended use.
Step 2: Shut Off the Water Supply
Always turn off the water before working on any plumbing fixture. For this step:
-
Locate your main water shut-off valve, usually found near the water meter or where the main line enters your home.
-
Turn it clockwise until fully closed.
-
Then, open the faucet or appliance connected to the supply line you’re working on. This drains remaining water from the line and releases pressure.
Allow a few minutes for the line to fully drain. Working with a dry line reduces mess and makes installation easier and safer.
Step 3: Cut the Supply Line
Once the water is off and the line is drained, it’s time to cut the pipe where the valve will be installed.
-
Use a pipe cutter to make a clean, straight cut. If you’re using a hacksaw, go slowly and keep the cut as square as possible.
-
Make sure you cut enough pipe to remove any damaged section or to properly fit the valve.
-
Avoid crushing or distorting the pipe—precision here is key to a leak-free seal later.
If you’re working with PEX or CPVC instead of copper, follow material-specific cutting instructions and use the correct tools for those materials.
Step 4: Prepare the Pipe End
After cutting the pipe, it’s important to clean and prep the surface to ensure a tight, secure connection.
-
Use emery cloth or sandpaper to smooth the cut end of the pipe.
-
Remove any burrs, rust or rough spots. These can prevent a proper seal and may cause leaks down the line.
-
Wipe the pipe with a clean cloth to remove dust or particles.
This step is especially important with copper pipes, as a rough or dirty surface can compromise the valve’s compression fitting.
Step 5: Wrap Threads and Install the Valve
With the pipe prepped, it’s time to install the angle stop valve.
-
If your valve has threaded connections, wrap the male threads with PTFE tape to create a watertight seal. Wrap it clockwise 3–4 times so it doesn’t unwind as you screw on the valve.
-
Slide the valve onto the pipe, then hand-tighten it in place.
-
Use an adjustable wrench to finish tightening, holding the pipe steady with another wrench if needed. Tighten it snugly—but don’t overtighten, as this can strip threads or crack fittings.
If you’re using a compression-style valve, insert the compression ring (ferrule) and nut first before tightening the valve body.
Step 6: Connect the Fixture or Appliance
Now that the valve is installed, you can connect the supply line to your fixture.
-
Attach the flexible water supply line (typically braided stainless steel) from the valve’s outlet to the fixture inlet (such as a faucet or toilet fill valve).
-
Tighten all connections using a wrench or pliers, being careful not to overtighten.
-
If needed, apply PTFE tape to the fixture connection as well for added leak protection.
Check that the hose is not kinked or twisted—a straight, flexible line ensures proper water flow and prevents unnecessary stress on the fittings.
Step 7: Turn On the Water and Test
Once everything is securely connected, it’s time to test your work.
-
Turn the main water supply back on slowly, watching the angle stop valve for any immediate leaks.
-
With the valve in the open position, turn on the faucet or appliance connected to it and check for full water flow.
-
Carefully inspect the valve and supply line for any drips or moisture.
If you spot a leak, turn off the water and retighten the connections. If the leak persists, disassemble and inspect the fittings, rewrap the threads with PTFE tape and reinstall.
Conclusion: A Small Fix with Big Benefits
Installing an angle stop valve is a relatively small project, but it brings major convenience and safety benefits. It allows you to isolate water to individual fixtures without affecting your whole home—a real advantage during plumbing repairs or emergencies.
By following this step-by-step guide, you can confidently complete the installation yourself using common tools and materials. Always take your time, check your work carefully and don’t hesitate to call a licensed plumber if something doesn’t feel right.
A properly installed angle stop valve can last for many years and give you peace of mind with every turn of the handle.

