
Gate valves play a vital role in plumbing systems, ensuring the smooth control of fluid flow. However, over time, the sealing mechanism of a gate valve can wear down, leading to leaks and compromised performance. Repacking a gate valve is a fundamental maintenance task that can restore its functionality and prevent potential issues. In this comprehensive guide, we will take a closer look at the step-by-step process of repacking a gate valve, empowering you to confidently tackle this task and keep your plumbing system running smoothly.
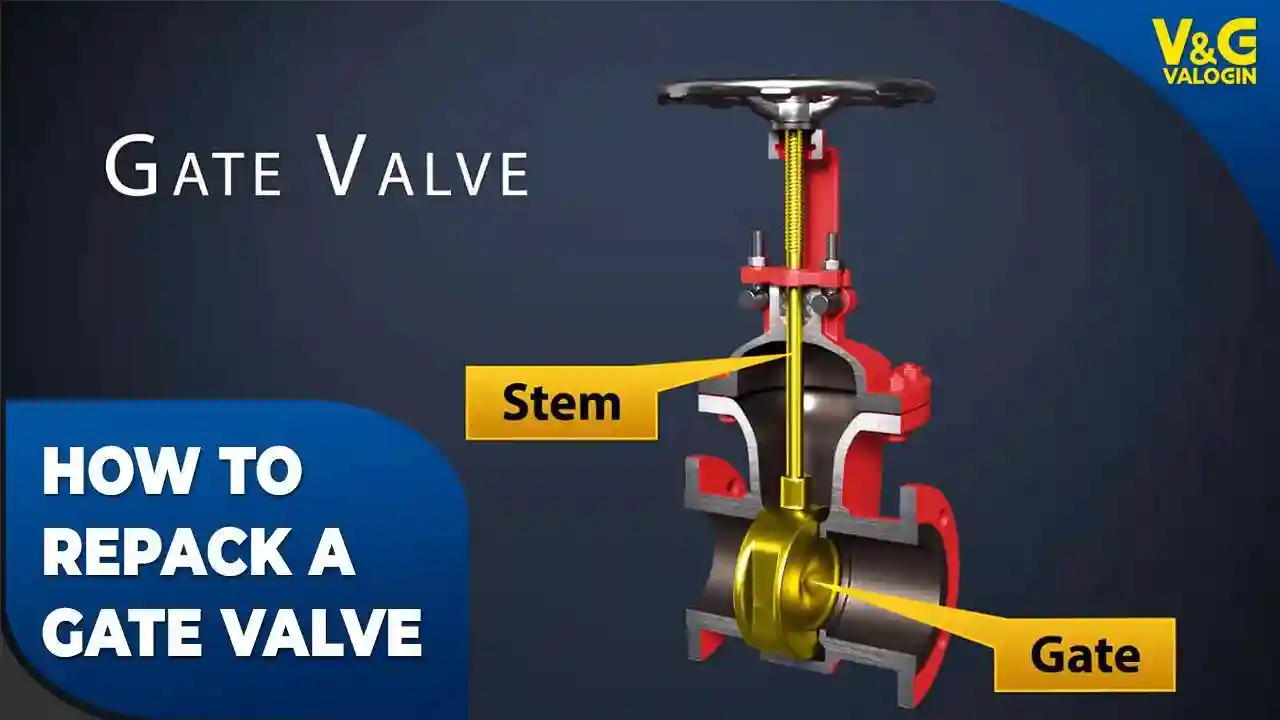
Gate valves are unique among other valve types, employing a sliding gate mechanism to regulate fluid flow. When the valve is open, the gate retracts fully, allowing unimpeded flow. Conversely, closing the valve involves lowering the gate to form a seal against the valve seat, halting the passage of fluid. Repacking a gate valve entails replacing the packing material to restore the tight seal between the gate and the valve body. By understanding the inner workings of gate valves and following the correct repacking procedure, you can effectively maintain your plumbing system’s integrity and efficiency.
Understanding Gate Valves:
Gate valves are an integral component of plumbing systems, responsible for controlling the flow of liquids. Before diving into the process of repacking a gate valve, it is crucial to have a solid understanding of how these valves function. Unlike other types of valves, gate valves utilize a sliding gate mechanism to regulate the flow of fluid. When the valve is fully open, the gate retracts completely, allowing unrestricted flow. Conversely, closing the valve involves lowering the gate to create a seal against the valve seat, effectively stopping the passage of fluid.
The primary advantage of gate valves lies in their ability to provide a straight-through flow path with minimal obstruction. This design allows for low friction loss and efficient flow control, making gate valves suitable for a wide range of applications. Gate valves are commonly found in plumbing systems, industrial processes and even in the oil and gas industry.
Gate valves can be classified into two main types: rising stem gate valves and non-rising stem gate valves. In rising stem gate valves, the stem attached to the gate rises or lowers as the valve is opened or closed, providing a visual indication of the valve’s position. Non-rising stem gate valves, on the other hand, have the gate and stem in a fixed position, making them more compact and suitable for installations with limited vertical space.
Understanding the basic functioning and classification of gate valves is crucial when it comes to repacking them. Repacking involves replacing the packing material surrounding the valve stem to ensure a proper seal between the gate and the valve body. By familiarizing yourself with the fundamentals of gate valves, you will be better equipped to proceed with the repacking process and maintain the optimal performance of your plumbing system.
Gathering the Necessary Tools
To successfully repack a gate valve, it is essential to have the right tools and materials at hand. This section will outline the items you’ll need before embarking on the repacking process.
- Adjustable wrench: Used to disconnect and reconnect the valve from the pipeline.
- Screwdriver: Required to remove screws or fasteners securing the valve handle.
- Valve packing material: Typically made of graphite or PTFE (polytetrafluoroethylene), this material provides the necessary sealing properties.
- Packing tool: A tool designed to compress the packing material to the desired density and shape.
- Lubricant: A silicone-based lubricant helps facilitate the smooth operation of the valve.
Step-by-Step Repacking Process
Now that you have the necessary tools and materials, let’s explore the step-by-step process of repacking a gate valve. Please note that the exact steps may vary depending on the specific valve design and manufacturer’s instructions. Always refer to the manufacturer’s documentation for detailed guidance.
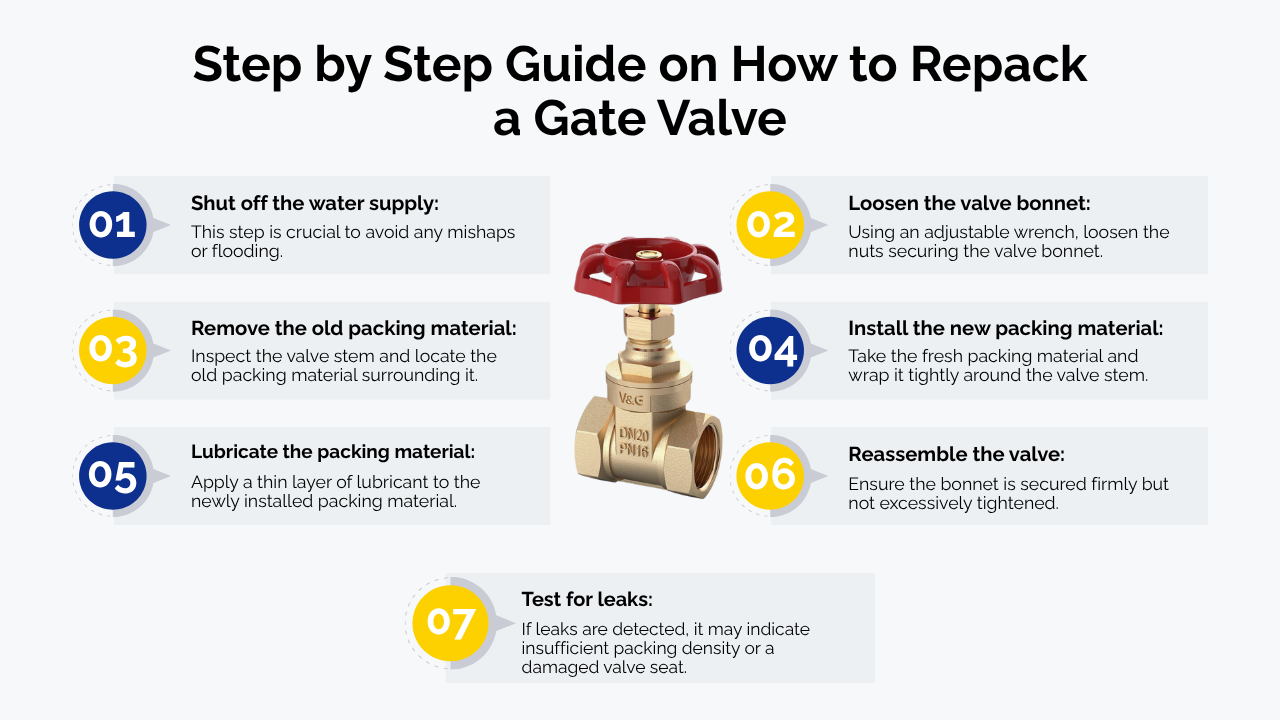
- Shut off the water supply: Locate the main water supply valve and turn it off to prevent water flow during the repacking process. This step is crucial to avoid any mishaps or flooding.
- Loosen the valve bonnet: Using an adjustable wrench, loosen the nuts securing the valve bonnet. Carefully remove the bonnet, exposing the valve stem and gate.
- Remove the old packing material: Inspect the valve stem and locate the old packing material surrounding it. Gently remove the old packing material, ensuring no remnants are left behind.
- Install the new packing material: Take the fresh packing material and wrap it tightly around the valve stem. Use your fingers to ensure a snug fit. If necessary, utilize the packing tool to compress the material to the desired density.
- Lubricate the packing material: Apply a thin layer of lubricant to the newly installed packing material. This lubrication helps minimize friction and ensures smooth operation of the valve.
- Reassemble the valve: Carefully place the valve bonnet back onto the valve body and tighten the nuts with an adjustable wrench. Ensure the bonnet is secured firmly but not excessively tightened.
- Test for leaks: Turn on the main water supply and gradually open the valve. Observe the valve for any signs of leaks. If leaks are detected, it may indicate insufficient packing density or a damaged valve seat.
The Conclusion
Repacking a gate valve is a fundamental maintenance task that can greatly impact the performance and longevity of your plumbing system. By following the step-by-step process outlined in this comprehensive guide, you can confidently undertake the repacking process and restore the tight seal between the gate and the valve body.
Gate valves, with their sliding gate mechanism, offer efficient flow control and minimal friction loss. Understanding their basic functioning and classification is crucial in successfully repacking them. Whether you’re dealing with a rising stem gate valve or a non-rising stem gate valve, the repacking process remains essential to maintain the integrity of the valve and prevent leaks.

