

Compression valves are a type of valve that uses a sealing ring to create a watertight seal. They are relatively inexpensive and easy to install and repair. Compression valves are also very durable and offer a tight seal, making them a popular choice for a variety of plumbing applications.Compression valves are used in a variety of plumbing applications, including shutoff valves, angle stops, and faucet stems. Shutoff valves are used to turn off the water supply to a fixture or appliance, such as a washing machine or dishwasher. Angle stops are used to turn off the water supply to a faucet, such as a kitchen or bathroom faucet. Faucet stems are the internal parts of a faucet that control the flow of water.

Compression valves are typically made of brass, although plastic and stainless steel valves are also available. The sealing ring is typically made of rubber, although neoprene and other materials are also used.To install a compression valve, first turn off the water supply to the valve location. Then, remove the old valve, if necessary. Apply a thin coat of plumber’s grease to the threads of the new valve and screw it into place.
Tighten the valve with a wrench until it is snug, but do not overtighten.To open a compression valve, turn the valve stem counterclockwise. To close the valve, turn the valve stem clockwise.Compression valves require very little maintenance. However, it is important to lubricate the valve stem regularly to prevent it from becoming difficult to turn. It is also important to inspect the sealing ring for wear and damage. If the sealing ring is worn or damaged, it should be replaced.

Step 1: Prepare for Installation
Commence the installation process by meticulously gathering all the indispensable tools and materials essential for the seamless installation of the compression valve. This comprehensive toolkit should encompass safety glasses, gloves, a reliable pipe cutter, plumber’s grease, and, of course, the designated compression valve kit. Furthermore, before embarking on the physical aspects of the installation, prudently identify the specific location where the compression valve is destined to be affixed. To avert potential mishaps or leaks during the installation, it is imperative to judiciously shut off the water supply to this location.
Step 2: Ensure Personal Safety
Underscore the paramount importance of personal safety by conscientiously donning the requisite protective gear—safety glasses and gloves. These protective measures serve as a crucial shield against potential injuries that may arise from the sharp edges or debris encountered during the intricate process of working with plumbing tools and materials.
Step 3: Cut the Water Pipe
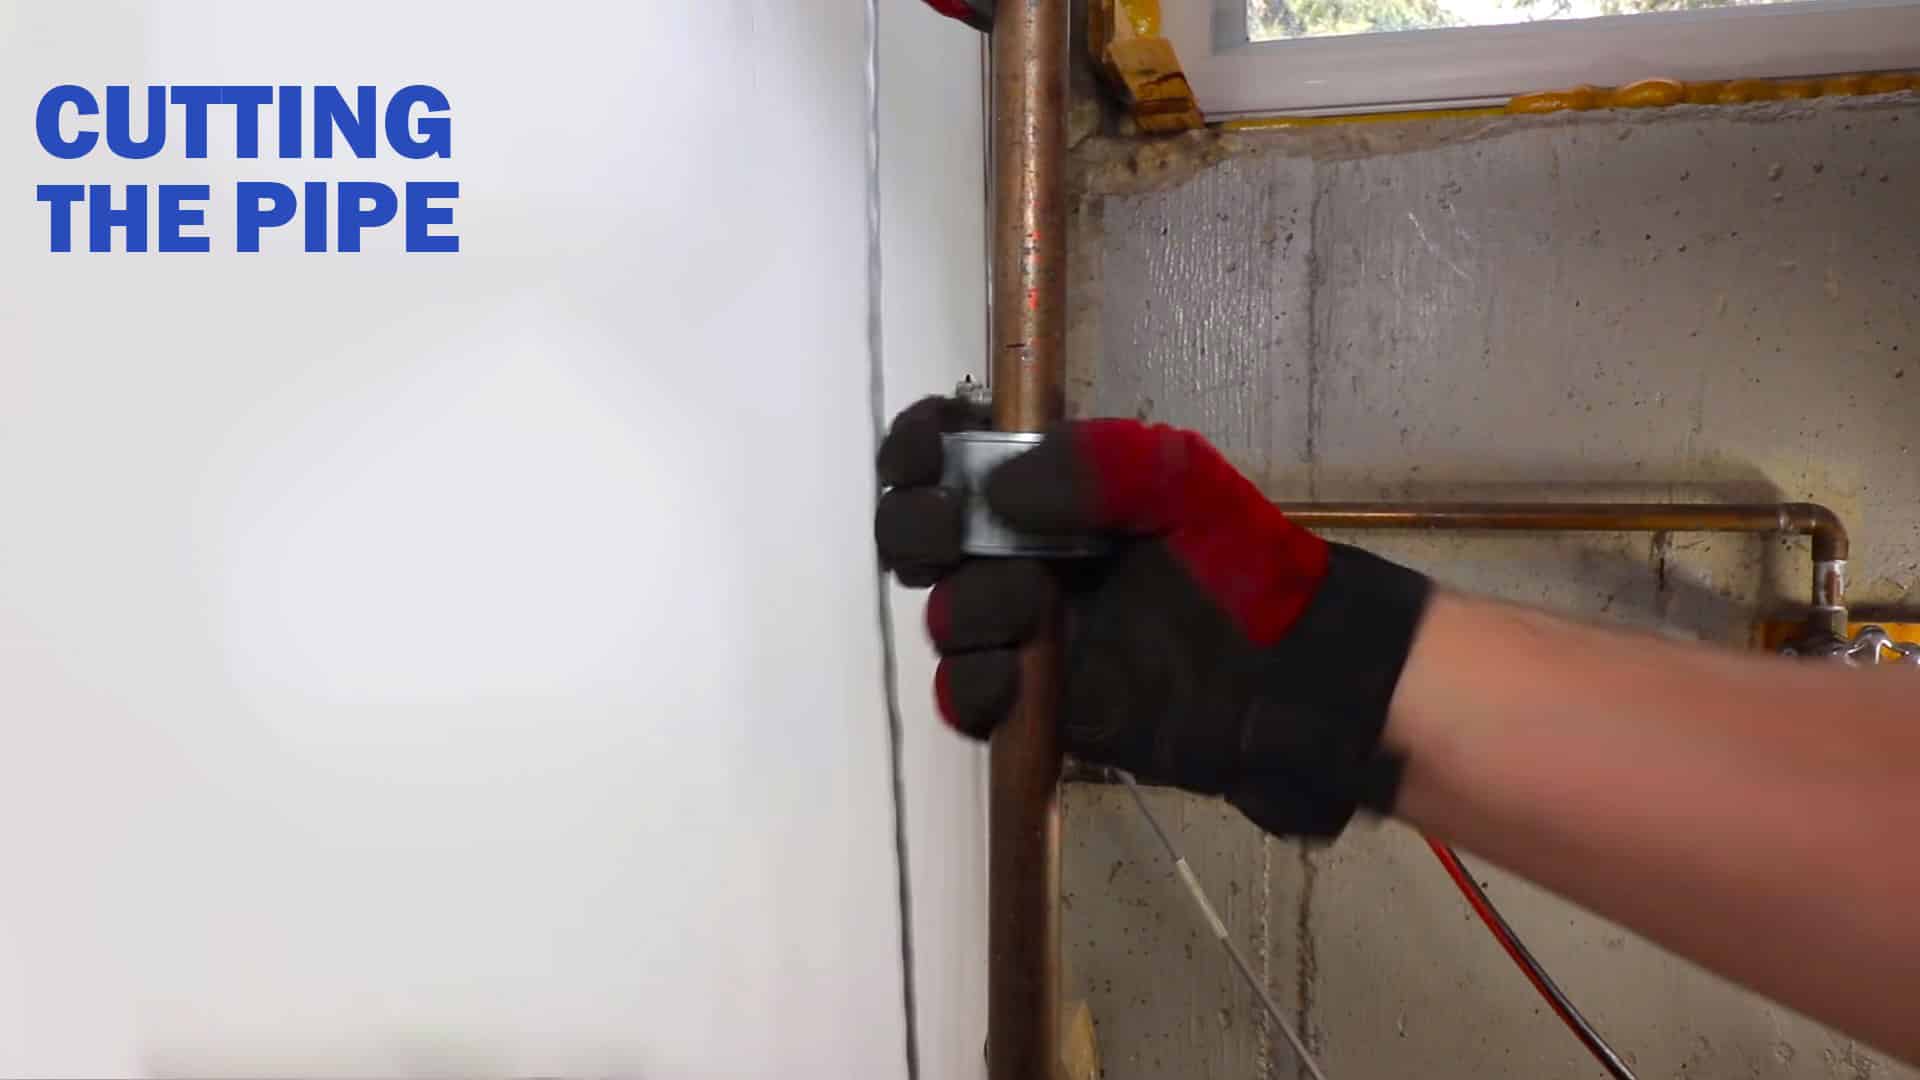
Transition to the actual preparation of the water pipe, post-establishing the installation site and ensuring optimal safety measures. Engage in a meticulous measurement and marking process to pinpoint the exact location on the pipe where the compression valve is destined to reside. Employ a precision instrument such as a pipe cutter to execute a clean, precise cut, exercising due caution to mitigate any potential risks posed by sharp edges. Should any rough areas persist, these should be promptly addressed through meticulous smoothing with a file.
Step 4: Apply Plumber’s Grease
Before advancing to the pivotal stage of installing the compression valve, augment its efficacy by meticulously applying a thin layer of plumber’s grease to the intricate valve threads. This seemingly minor yet critical step plays a foundational role in establishing a robust, watertight seal—effectively shielding against corrosion and ensuring the sustained longevity of the entire installation.
Step 5: Install the Compression Valve

Navigate through the intricacies of the installation process by closely adhering to the elaborate instructions thoughtfully provided within the compression valve kit. This procedural choreography typically entails the gradual sliding of the compression nut and ferrule onto the carefully prepared pipe, the precise positioning of the valve, and the application of a wrench to methodically tighten the nut. Each step necessitates meticulous attention to detail, ensuring a precise and secure execution.
Step 6: Avoid Over Tightening
Exercise an acute sense of precision when engaging in the tightening process, thereby averting the potential peril of causing damage to the valve or the surrounding pipe. Striking an equilibrium, applying the requisite force to achieve a secure fit without surpassing the threshold that could lead to inadvertent harm, is of the utmost importance.
Step 7: Test for Leaks
Upon the culmination of the installation, initiate a gradual restoration of the water supply, all the while conducting a scrupulous inspection of the entire setup to identify any subtle signs of leaks. This meticulous scrutiny should encompass a thorough examination of all connections, including the compression nut and valve threads. Should any leaks be discerned, swift and resolute action is imperative to rectify these issues promptly—ensuring the uncompromised integrity of the entire installation.
Step 8: Final Check and Clean-Up
Draw the installation process to its denouement by subjecting the compression valve to a final, discerning check. Verify its correct functionality by meticulously operating the valve, oscillating between opening and closing to ascertain a smooth and unobstructed functionality. Concurrently, listen for any atypical sounds or indications of potential malfunction. In a concluding cadence, undertake a thorough and systematic clean-up of the work area, meticulously disposing of debris and surplus materials in an ecologically responsible manner.
Always consult and adhere to the specific instructions thoughtfully provided within your compression valve kit. Such meticulous compliance with these guidelines serves as the linchpin for a triumphant and enduring compression valve installation.
The Conclusion
In conclusion, a meticulous approach to compression valve installation ensures a seamless and reliable plumbing solution. By following these detailed steps, from thorough preparation to cautious execution, users can establish a robust and leak-free connection. Prioritizing personal safety, precise cutting of the water pipe, and judicious application of plumber’s grease contribute to the longevity and efficiency of the compression valve. Regular checks for leaks and a final operational examination guarantee a successful installation. In undertaking these measures, individuals can confidently secure their plumbing systems, fostering durability and functionality in their compression valve installations.

