
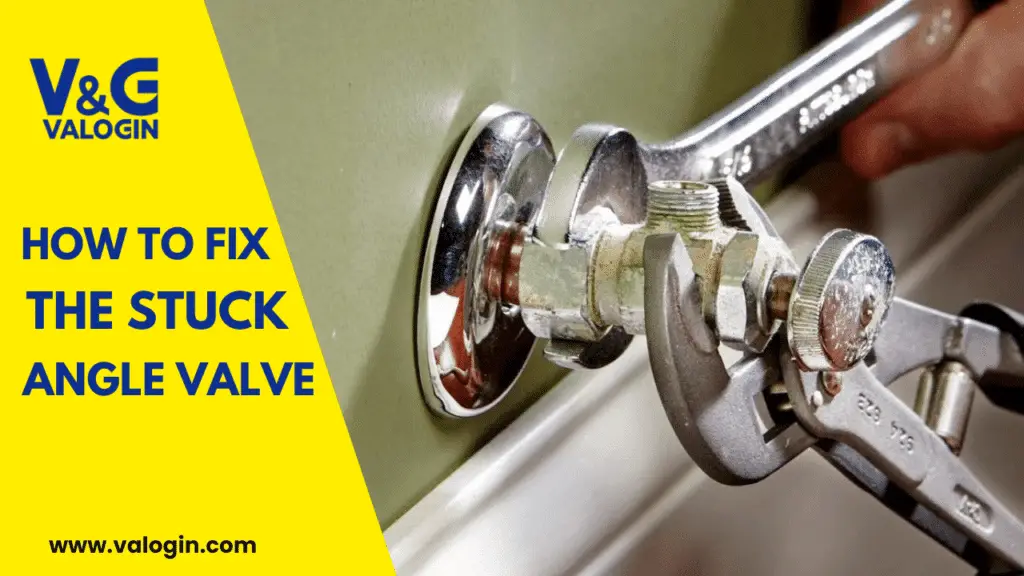
Dealing with a stuck angle valve can be one of the more frustrating plumbing issues, especially when you’re trying to replace a fixture or stop a leak. These small valves, often found under sinks and behind toilets, are designed to control water flow to individual fixtures. Over time, however, they can become seized due to corrosion, mineral buildup or simply age. Fortunately, with the right tools and technique, you can remove a stuck angle valve without damaging your pipes or fittings.
In this guide, we’ll walk you through everything you need to know about removing a stuck angle valve — from understanding why it gets stuck in the first place to safely replacing it. This step-by-step tutorial is perfect for DIY homeowners, plumbers and maintenance professionals alike.
What Is an Angle Valve?
An angle valve is a compact shut-off valve that connects a plumbing fixture (like a faucet or toilet) to the water supply. It gets its name from its 90-degree shape, which allows the valve to redirect the water flow. These valves offer convenience, especially during plumbing repairs or upgrades, by isolating water flow to a specific area without shutting off the entire supply line.
Angle valves are available in a range of materials such as brass, plastic or stainless steel. Brass and stainless steel are commonly used for their durability and resistance to corrosion. Despite their small size, these valves play a critical role in controlling and maintaining the water system. However, due to exposure to moisture and hard water, they can become stuck or jammed over time, making them difficult to remove or operate.
Why Angle Valves Get Stuck
There are several reasons why an angle valve might become stuck or hard to remove:
1. Corrosion
Over time, exposure to moisture and oxygen can cause metal parts to corrode, especially in older valves made from low-quality materials. Corrosion forms rust and creates resistance, making the valve hard to turn or remove.
2. Mineral Buildup
In areas with hard water, calcium, lime and other minerals can accumulate around the valve threads. This buildup can cause the valve to seize and resist any attempt to unscrew it.
3. Overtightening During Installation
Sometimes, angle valves are installed too tightly — either by hand or using tools. This creates excessive stress on the threads and connection points, making it nearly impossible to loosen the valve without applying significant force.
4. Aging and Wear
Valves that have been in place for years can deteriorate internally. The threads, seals or mechanisms may degrade, contributing to the valve becoming immobile or difficult to turn.
Tools You’ll Need
Before attempting to remove a stuck valve, gather the following tools and materials to ensure the job goes smoothly:
-
Adjustable wrench or spanner: For gripping and turning the valve.
-
Penetrating oil (e.g., WD-40): Helps dissolve rust and loosen metal parts.
-
Pipe wrench: Offers extra grip and torque for tougher jobs.
-
Bucket or towels: To catch any water that may spill out during removal.
-
Heat gun or hairdryer: Useful for expanding metal parts when necessary.
-
Plumber’s tape (Teflon tape): Ensures a leak-proof seal during reinstallation.
-
Replacement angle valve: In case the old valve is damaged or worn out.
Having the right tools on hand not only saves time but also minimizes the risk of causing further damage to pipes or fittings.
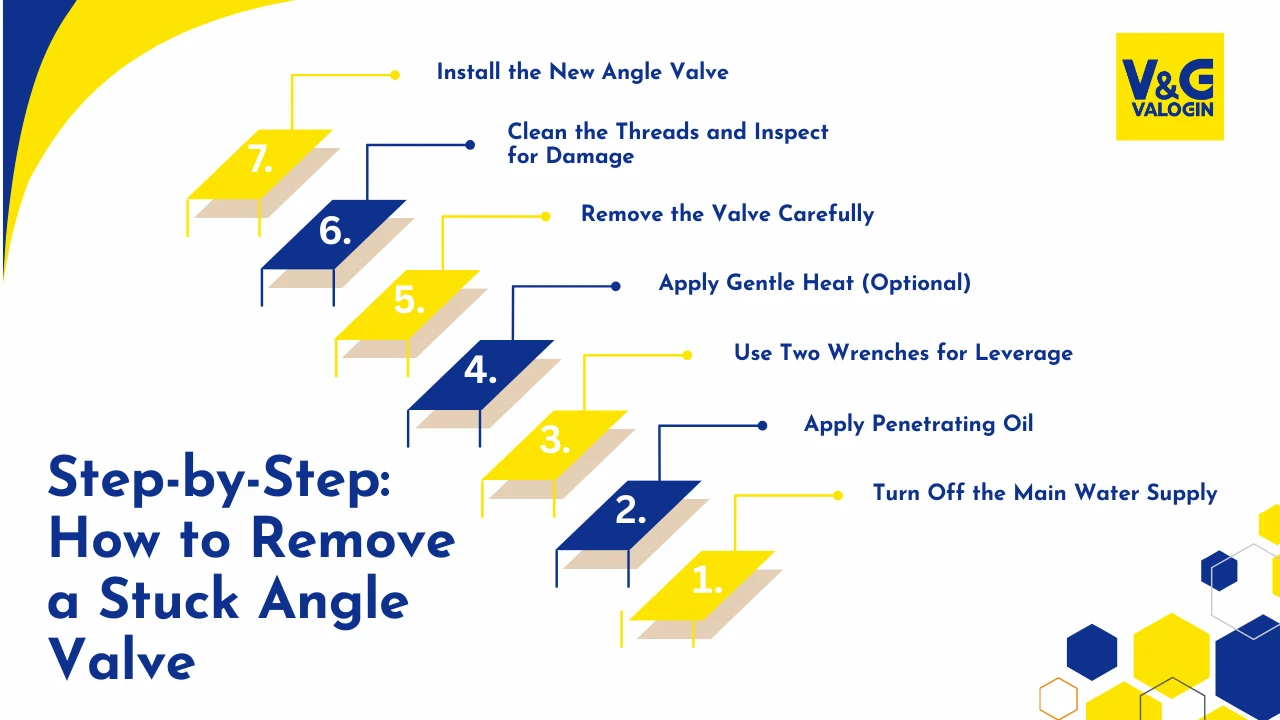
Step-by-Step: How to Remove a Stuck Angle Valve
1. Turn Off the Main Water Supply
Always begin by turning off the main water supply. This ensures that no water flows through the pipes while you work, reducing the risk of leaks or water damage. Locate the main valve (usually near the water meter or basement) and turn it clockwise to shut it off.
After shutting off the supply, open the nearest faucet to release any residual pressure and drain the water left in the pipes. This small step can make the removal process much cleaner and safer.
2. Apply Penetrating Oil
Spray a generous amount of penetrating oil around the connection point of the stuck angle valve. Focus on where the valve threads meet the pipe. Allow the oil to soak for at least 15 to 30 minutes. The longer it sits, the better it can work through the rust or buildup.
This oil breaks down corrosion and helps loosen metal parts that have fused together. If the valve still doesn’t move after the first application, apply another round and let it sit longer.
3. Use Two Wrenches for Leverage
Once the oil has had time to work, use two wrenches to safely attempt removal. One wrench should hold the pipe steady, while the other turns the valve. This technique, known as the “backup wrench method,” prevents you from twisting or cracking the supply pipe during removal.
Start with gentle pressure. Avoid sudden or jerky movements, as these can cause damage or strip the threads. If the valve begins to turn, continue loosening it until it’s free from the fitting.
4. Apply Gentle Heat (Optional)
If the valve remains stuck, try applying controlled heat to the fitting using a hairdryer or heat gun. Heating the metal causes it to expand slightly, which can break the bond between the valve and pipe threads.
Make sure to heat the area evenly for a few minutes. Avoid overheating or using an open flame, especially around plastic pipes or flammable surroundings. After heating, try loosening the valve again with your wrenches.
5. Remove the Valve Carefully
Once the valve is loosened, unscrew it by hand or continue using your wrench until it is completely free. Be sure to catch any remaining water in a bucket or with towels placed underneath the area.
If the valve is heavily corroded or stuck halfway, avoid forcing it. At this stage, assess whether it’s better to stop and consult a plumber to prevent damage to the pipe or threads.
6. Clean the Threads and Inspect for Damage
After removing the valve, inspect the pipe threads thoroughly. Use a wire brush or rag to clean off any rust, old Teflon tape or mineral residue. Check for signs of stripped threads, cracks or leaks. If the pipe looks damaged, you may need to rethread it or use a compression fitting as a workaround.
Proper thread cleaning ensures a smooth installation of the new valve and reduces the risk of leaks in the future.
7. Install the New Angle Valve
Wrap the pipe threads with plumber’s tape (Teflon tape) in a clockwise direction. This helps create a watertight seal when installing the new valve. Then, hand-tighten the new angle valve onto the threads before securing it with a wrench.
Once installed, turn the main water supply back on slowly. Check for any signs of leakage around the valve. If everything looks secure, the job is complete.
Tips to Prevent a Valve from Getting Stuck Again
-
Operate valves periodically to prevent them from seizing due to inactivity.
-
Use high-quality materials such as brass or stainless steel, which resist corrosion better than plastic or cheap metals.
-
Apply Teflon tape during installation to reduce thread binding and make future removal easier.
-
Avoid overtightening, which puts excess pressure on the threads and shortens the valve’s lifespan.
-
Check for leaks regularly, especially in older plumbing systems.
When to Call a Professional
Sometimes, despite your best efforts, a valve may remain completely immobile. If you notice the supply pipe starting to bend or twist or if you’re unable to turn the valve without using extreme force, it’s time to call a licensed plumber. Forcing a stuck valve can lead to cracked pipes, thread damage or even flooding—resulting in more costly repairs.
A professional has specialized tools and experience to safely remove the valve and repair any underlying issues without causing additional damage.
Conclusion
Removing a stuck angle valve doesn’t have to be a daunting task. With the right tools, preparation and methodical approach, you can successfully tackle this common plumbing challenge. Whether it’s corrosion, overtightening or mineral buildup that’s causing the problem, patience and proper technique will go a long way in ensuring a smooth removal and replacement.
Now that you know how to remove a stuck angle valve, you’re better equipped to maintain your plumbing system, handle minor repairs and extend the lifespan of your fixtures. Remember to always work carefully, follow safety steps and seek professional help when needed to avoid turning a simple valve replacement into a costly repair job.

